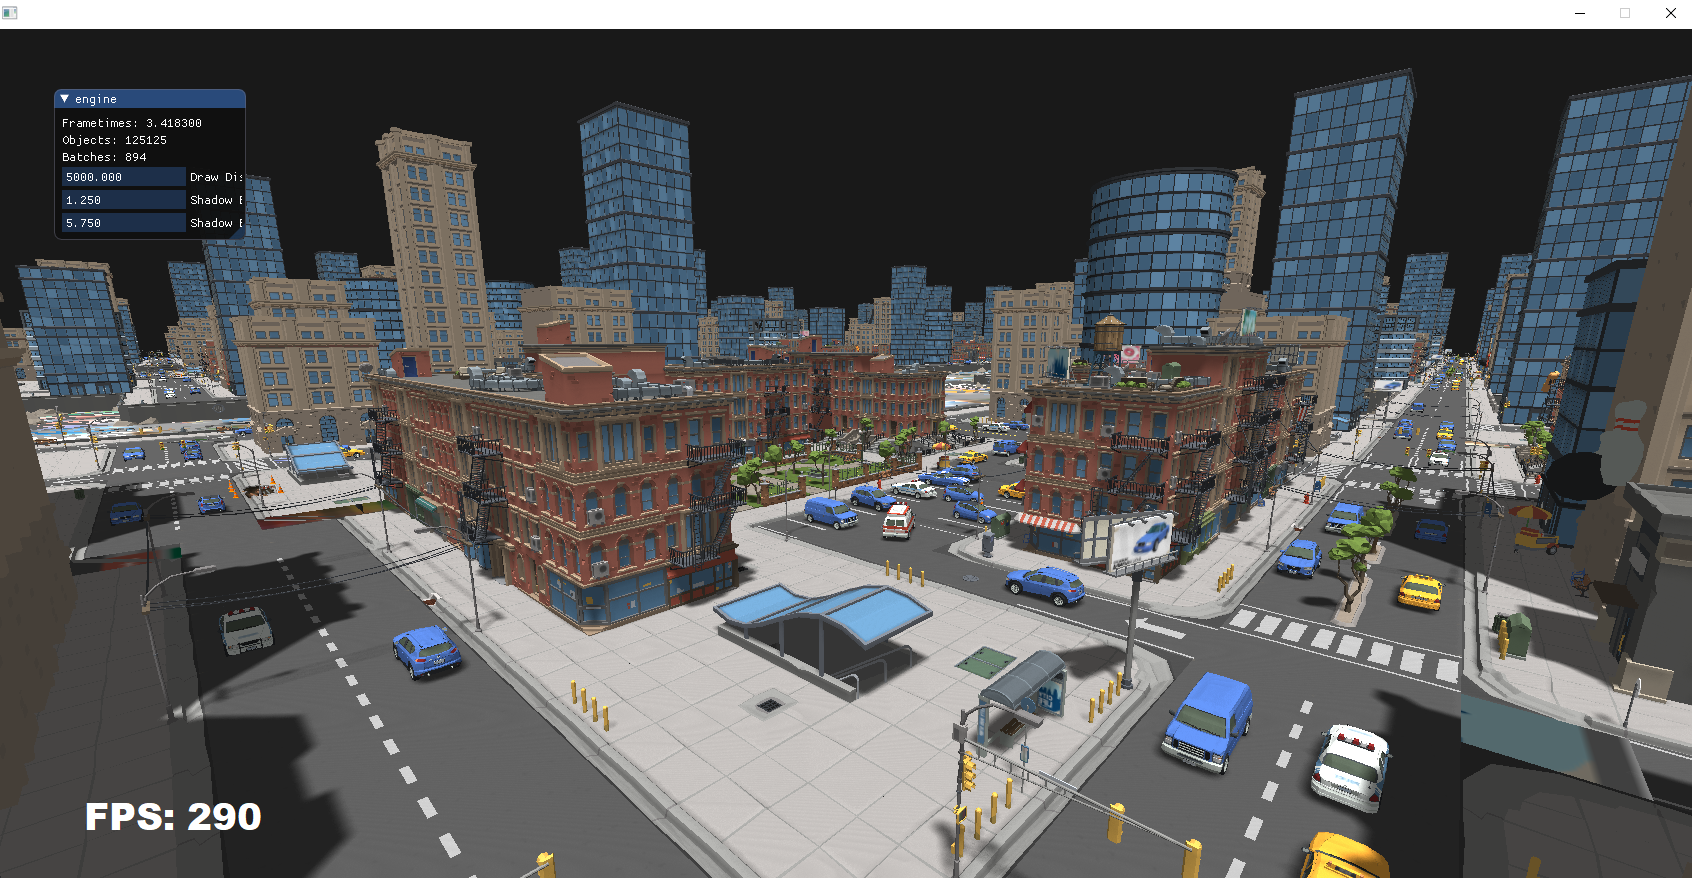
 Tutorial codebase, 125.000 objects processed and culled on main view and shadow view, 290 FPS. This view renders more than 40 million triangles due to the 2 mesh passes. Rendered on a RTX 2080.
Deprecation warning
This chapter is outdated for the current version of vkguide and its valid for Legacy Vkguide. Its techniques can be still applied on new vkguide, but the text and code is meant for legacy vkguide. A new version of this chapter is being written as chapter 7 of the new Vkguide.
GPU Driven Rendering
Over the last few years, bleeding edge render engines have been moving more and more towards calculating the rendering itself on the GPU in compute shaders. Thanks to the introduction of MultiDrawIndirect and similar features, it’s now possible to do a very big amount of the work for the rendering inside compute shaders. The benefits are clear:
- GPUs have orders of magnitude higher performance than CPU on data-parallel algorithms. Rendering is almost all data parallel algorithms.
- With the GPU deciding its own work, latencies are minimized as there is no roundtrip from CPU to GPU and back.
- Frees up the CPU from a lot of work which can now be used on other things.
The result is an order of magnitude or more scene complexity and object counts. In the code that we will walk through in later chapters, based on the engine at the end of chapter 5 tutorial, we can run 250.000 “drawcalls”, on Nintendo Switch, at more than 60 fps. On PC it reaches 500 fps. We essentially have a nearly unlimited object count, with the bottleneck moved into just how many triangles are we trying to make the GPU draw.
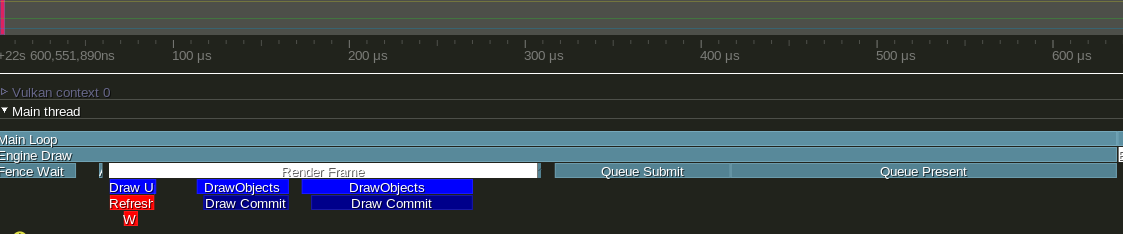 CPU processing takes less than 0.5 milliseconds. Same view as above. Ryzen 1700
Techniques based on compute-shader-rendering have been becoming more popular in the last 5 years. Before that, they were used more on CAD type scenes. Famously, Assassins Creed Unity and sequels use these techniques to achieve an order of magnitude more complex scenes, with Paris having an immense amount of objects as it is also rendering interiors for a lot of buildings. Frostbite engine from EA also uses these techniques to have very high geometry detail on Dragon Age Inquisition. These techniques are also the reason Rainbow Six Siege can have thousands of dynamic rubble objects created from its destruction systems. The techniques have become very popular on the PS4 and Xbox One generation of consoles as they are easily bottlenecked on triangle throughput, so having very accurate culling gives very great performance gains. Unreal Engine 4 and Unity do NOT use these techniques, but it looks like Unreal Engine 5 will use them.
Draw Indirect
The core of the idea revolves around the use of Draw Indirect support in the graphics APIs. These techniques work on all graphics APIs, but they work best on Vulkan or DX12 because they allow better control over low level memory management and compute barriers. They also work great on the PS4 and Xbox One consoles and the next generation has features that leans even more into it, such as Mesh Shaders and raytracing.
Draw indirect is a drawcall that takes its parameters from a GPU buffer instead of from the call itself. When using draw indirect, you just start the draw based on a position on a gpu buffer, and then the GPU will execute the draw command in that buffer.
Pseudocode:
//normal drawing ---------------
vkCmdDrawIndexed(cmd, object.indexCount, 1 /* instance count */,object.firstIndex, object.vertexOffset, object.ID /* firstInstance */ );

//indirect drawing ---------------

Buffer* drawBuffer = create_buffer(sizeof(VkDrawIndexedIndirectCommand));

//we can immediately enqueue the draw indirect
vkCmdDrawIndexedIndirect(cmd, drawBuffer.buffer, 0 /* offset */, 1 /* drawCount */, sizeof(VkDrawIndexedIndirectCommand));


//we can write the actual draw command at any time we want before VkQueueSubmit(), or from a different thread, or from a compute shader
VkDrawIndexedIndirectCommand* command = map_buffer(drawBuffer);

command->indexCount = object.indexCount;
command->instanceCount = 1;
command->firstIndex = object.firstIndex ;
command->vertexOffset = object.vertexOffset;
command->firstInstance = object.ID;
Because it takes its parameters from a buffer, it is possible to use compute shaders to write into these buffers and do culling or LOD selection in compute shaders. Doing culling this way is one of the simplest and most performant ways of doing culling. Due to the power of the GPU you can easily expect to cull more than a million objects in less than half a millisecond. Normal scenes don’t tend to go as far. In more advanced pipelines like the one in Dragon Age or Rainbow Six, they go one step further and also cull individual triangles from the meshes. They do that by writing an output Index Buffer with the surviving triangles and using indirect to draw that.
When you design a GPU-driven renderer, the main idea is that all of the scene should be on the GPU. In chapter 4, we saw how to store the matrices for all loaded objects into a big SSBO. In GPU driven pipelines, we also want to store more data, such as material ID and cull bounds. Once we have a renderer where everything is stored in big GPU buffers, and we don’t use PushConstants or descriptor sets per object, we are ready to go with a GPU-driven-renderer. The design of the tutorial engine is one that maps well into refactoring for a extreme performance compute based engine.
Due to the fact that you want to have as much things on the GPU as possible, this pipeline maps very well if you combine it with “Bindless” techniques, where you stop needing to bind descriptor sets per material or changing vertex buffers. In Doom Eternal engine, they go all-in on bindless, and the engine ends up doing very few drawcalls per frame. On this guide we will not use bindless textures as their support is limited, so we will do 1 draw-indirect call per material used. We will still merge all of the meshes into a big vertex buffer to avoid having to constantly bind it between draws. Having a bindless renderer also makes raytracing much more performant and effective.
Bindless Design
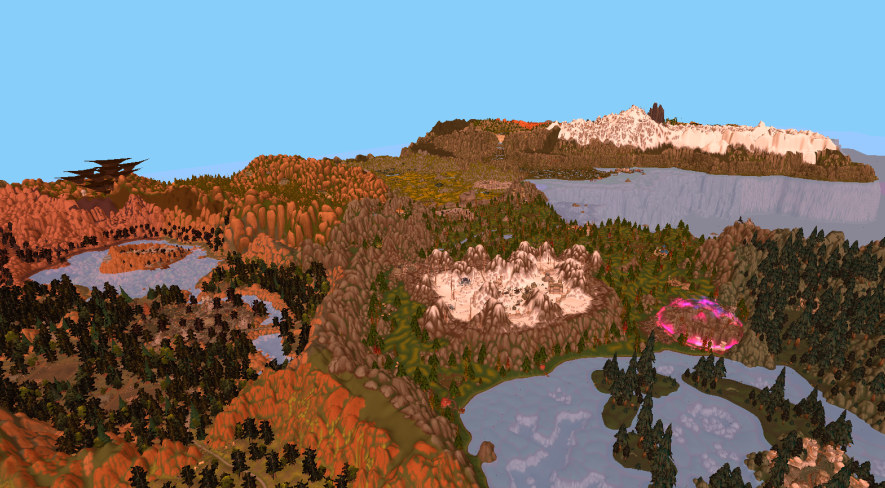 NovusCore Wow emulation research project. An entire continent from World of Warcraft rendered in less than 10 drawcalls at 100+ FPS. Infinite draw distance.
GPU driven pipelines work best when the amount of binds is as limited as possible. Best case scenario is to do a extremely minimal amount of BindVertexBuffer, BindIndexBuffer, BindPipeline, and BindDescriptorSet calls. Bindless designs make the cpu side work a lot faster due to the CPU having to do much less work, and the GPU can also go faster due to better utilization as each drawcall is “bigger”. The less drawcalls you use to render your scene, the better, as modern GPUs are really big and have a big ramp up/ramp down time. Big modern GPUs love when you give them massive amounts of work on each drawcall, as that way they can ramp up to 100% usage.
To move vertex and index buffers to bindless, generally you do it by merging the meshes into really big buffers. Instead of having 1 buffer per vertex buffer and index buffer pair, you have 1 buffer for all vertex buffers in a scene. When rendering, then you use BaseVertex offsets in the drawcalls.
In some engines, they remove vertex attributes from the pipelines entirely, and instead grab the vertex data from buffers in the vertex shader. Doing that makes it much easier to keep 1 big vertex buffer for all drawcalls in the engine even if they use different vertex attribute formats. It also allows some advanced unpacking/compression techniques, and it’s the main use case for Mesh Shaders.
To move textures into bindless, you use texture arrays. With the correct extension, the size of the texture array can be unbounded in the shader, like when you use SSBOs. Then, when accessing the textures in the shader, you access them by index which you grab from another buffer. If you don’t use the Descriptor Indexing extensions, you can still use texture arrays, but they will need a bounded size. Check your device limits to see how big can that be.
To make materials bindless, you need to stop having 1 pipeline per material. Instead, you want to move the material parameters into SSBOs, and go with an ubershader approach. In the Doom engines, they have a very low amount of pipelines for the entire game. Doom eternal has less than 500 pipelines, while Unreal Engine games often have 100.000+ pipelines. If you use ubershaders to massively lower the amount of unique pipelines, you will be able to increase efficiency in a huge way, as VkCmdBindPipeline is one of the most expensive calls when drawing objects in vulkan.
Push Constants and Dynamic Descriptors can be used, but they have to be “global”. Using push constants for things like camera location is perfectly fine, but you cant use them for object ID as that’s a per-object call and you specifically want to draw as many objects as possible in 1 draw.
The general workflow is to put stuff into buffers, and have big buffers so you don’t need to bind them every call. The bonus is that you can also write those buffers from the GPU, which is what Dragon Age Inquisition does for Index buffers, where it writes to them from the culling shaders so that only the visible triangles get drawn.
Links
- Assassins Creed Unity Engine + others: PDF Link
- Dragon Age Inquisition mesh culling: GDC Link
- Rainbow Six Siege engine: GDC Link
- Doom Eternal engine: Siggraph Link
- Nvidia Advanced Scenegraph: PDF Link
Overview of Vkguide engine architecture for compute rendering.
The techniques here can be directly implemented after the 5 chapters of the core tutorial. The engine also has the things from Extra chapter implemented, but should be easy to follow. The details of the system will be explored in next chapters.
The first thing is to go all in on object data in GPU buffers. Per-object PushConstants are removed, per-object dynamic uniform buffers are removed, and everything is replaced by ObjectBuffer where we store the object matrix and we index into it from the shader.
We also change the way the meshes work. After loading a scene, we create a BIG vertex buffer, and stuff all of the meshes of the entire map into it. This way we will avoid having to rebind vertex buffers.
With the data management done, we can implement the indirect draw itself.
We will split the renderable objects by mesh-pass. Each mesh-pass will be a specific pass in the renderer. In the tutorial, we will have 2 mesh passes, one for the forward-rendered meshes, and another one for the shadow casting. Some objects will be registered in one pass but not the other, and most will be in both passes. By separating the individual objects into multiple mesh-passes, we simplify the render loop significantly, and allow better performance.
The code that manages indirect draws is in the RenderScene class, which will grab all of the objects in a mesh-pass and sort them into batches. A Batch is a set of objects that matches material and mesh. Each batch will be rendered with one DrawIndirect call that does instanced drawing. Each mesh pass (forward pass, shadow pass, others) contains an array of batches which it will use for rendering.
In the main ObjectBuffer, we store the object matrix alongside the cull bounds per each object loaded in the engine.
When starting the frame, we sync the objects that are on each mesh pass into a buffer. This buffer will be an array of ObjectID + BatchID. The BatchID maps directly as an index into the batch array of the mesh-pass.
Once we have that buffer uploaded and synced, we execute a compute shader that performs the culling. For every object in said array of ObjectID + BatchID pairs, we access the object data in the ObjectBuffer using the ObjectID, and check if it is visible. If it’s visible, we use the BatchID index to insert the draw into the Batches array, which contains the draw indirect calls, increasing the instance count. We also write it into the indirection buffer that maps from the instance ID of each batch into the ObjectID.
With that done, on the CPU side we iterate over the batches in a mesh pass, and execute each of them in order, making sure to bind each batch pipeline and material descriptor set. The gpu will then use the parameters it just wrote into from the culling pass to render the objects.