Pipelines
Now that we can load the shaders we needed for the triangle, we have to build the VkPipeline to render it.
The VkPipeline is a huge object in Vulkan that encompasses the configuration of the entire GPU for the draw. Building them can be very expensive, as it will fully convert the shader module into the GPU instructions, and will validate the setup for it.
Once a pipeline is built, it can be bound inside a command buffer, and then when you draw anything it will use the bound pipeline.
Vulkan pipelines are a massive object with many different configuration structs, some of them even running pointers and being arrays. For this reason, we are going to create a class specifically for building pipelines, that will simplify the process.
Over the tutorial, we are going to create more pipelines, so having a relatively easy way to create pipelines will be of great use.
Let’s begin by declaring the class. We are going to add the class into the vk_engine.h header, alongside the VulkanEngine class.
vk_engine.h
class PipelineBuilder {
public:

	std::vector<VkPipelineShaderStageCreateInfo> _shaderStages;
	VkPipelineVertexInputStateCreateInfo _vertexInputInfo;
	VkPipelineInputAssemblyStateCreateInfo _inputAssembly;
	VkViewport _viewport;
	VkRect2D _scissor;
	VkPipelineRasterizationStateCreateInfo _rasterizer;
	VkPipelineColorBlendAttachmentState _colorBlendAttachment;
	VkPipelineMultisampleStateCreateInfo _multisampling;
	VkPipelineLayout _pipelineLayout;

	VkPipeline build_pipeline(VkDevice device, VkRenderPass pass);
};
The pipeline builder is a class with all the needed Vulkan structs stored inside (this is a basic set, there are more, but for now these are the ones we will need to fill). And a build_pipeline function that will finalize it and build it. If you want, you can put the builder in its own file (recommended vk_pipeline.h) but we aren’t doing it to keep number of files low.
We will now go to vk_initializers.h and start writing an initializer for each of those structs.
Initializers
Shader Stage
We are going to start with the initializer for VkPipelineShaderStageCreateInfo This CreateInfo will hold information about a single shader stage for the pipeline. We build it from a shader stage and a shader module.
VkPipelineShaderStageCreateInfo vkinit::pipeline_shader_stage_create_info(VkShaderStageFlagBits stage, VkShaderModule shaderModule) {

		VkPipelineShaderStageCreateInfo info{};
		info.sType = VK_STRUCTURE_TYPE_PIPELINE_SHADER_STAGE_CREATE_INFO;
		info.pNext = nullptr;

		//shader stage
		info.stage = stage;
		//module containing the code for this shader stage
		info.module = shaderModule;
		//the entry point of the shader
		info.pName = "main";
		return info;
	}
We are hardcoding the entry point to “main”. Remember from the last article that the entry point for the shaders was the main() function. This allows us to control it, but main() is fairly standard so let’s just keep it like that.
Vertex Input State
VkPipelineVertexInputStateCreateInfo contains the information for vertex buffers and vertex formats. This is equivalent to the VAO configuration on opengl, but at the time we are not using it, so we will initialize it with an empty state. On the next tutorial chapter we will learn how to set this one up correctly.
VkPipelineVertexInputStateCreateInfo vkinit::vertex_input_state_create_info() {
		VkPipelineVertexInputStateCreateInfo info = {};
		info.sType = VK_STRUCTURE_TYPE_PIPELINE_VERTEX_INPUT_STATE_CREATE_INFO;
		info.pNext = nullptr;

		//no vertex bindings or attributes
		info.vertexBindingDescriptionCount = 0;
		info.vertexAttributeDescriptionCount = 0;
		return info;
}
Input Assembly
VkPipelineInputAssemblyStateCreateInfo contains the configuration for what kind of topology will be drawn. This is where you set it to draw triangles, lines, points, or others like triangle-list.
VkPipelineInputAssemblyStateCreateInfo vkinit::input_assembly_create_info(VkPrimitiveTopology topology) {
		VkPipelineInputAssemblyStateCreateInfo info = {};
		info.sType = VK_STRUCTURE_TYPE_PIPELINE_INPUT_ASSEMBLY_STATE_CREATE_INFO;
		info.pNext = nullptr;

		info.topology = topology;
		//we are not going to use primitive restart on the entire tutorial so leave it on false
		info.primitiveRestartEnable = VK_FALSE;
		return info;
	}
On the info we just have to set boilerplate plus what kind of topology we want. Example topologies:
- VK_PRIMITIVE_TOPOLOGY_TRIANGLE_LIST : normal triangle drawing
- VK_PRIMITIVE_TOPOLOGY_POINT_LIST : points
- VK_PRIMITIVE_TOPOLOGY_LINE_LIST : line-list
Rasterization state
VkPipelineRasterizationStateCreateInfo. Configuration for the fixed-function rasterization. In here is where we enable or disable backface culling, and set line width or wireframe drawing.
VkPipelineRasterizationStateCreateInfo vkinit::rasterization_state_create_info(VkPolygonMode polygonMode)
	{
		VkPipelineRasterizationStateCreateInfo info = {};
		info.sType = VK_STRUCTURE_TYPE_PIPELINE_RASTERIZATION_STATE_CREATE_INFO;
		info.pNext = nullptr;

		info.depthClampEnable = VK_FALSE;
		//discards all primitives before the rasterization stage if enabled which we don't want
		info.rasterizerDiscardEnable = VK_FALSE;

		info.polygonMode = polygonMode;
		info.lineWidth = 1.0f;
		//no backface cull
		info.cullMode = VK_CULL_MODE_NONE;
		info.frontFace = VK_FRONT_FACE_CLOCKWISE;
		//no depth bias
		info.depthBiasEnable = VK_FALSE;
		info.depthBiasConstantFactor = 0.0f;
		info.depthBiasClamp = 0.0f;
		info.depthBiasSlopeFactor = 0.0f;

		return info;
	}
We are just going to leave polygonMode as editable input, to be able to toggle between wireframe and solid drawing.
cullMode is used to cull backfaces or frontfaces, but in here we are going to leave it with no cull by default. We are also not using any depth bias here, so we are going to set all of that to 0.
If rasterizerDiscardEnable is enabled, primitives (triangles in our case) are discarded before even making it to the rasterization stage which means the triangles would never get drawn to the screen. You might enable this, for example, if you’re only interested in the side effects of the vertex processing stages, such as writing to a buffer which you later read from. But in our case we’re interested in drawing the triangle, so we leave it disabled.
Multisampling State
VkPipelineMultisampleStateCreateInfo allows us to configure MSAA for this pipeline. We are not going to use MSAA on the entire tutorial, so we are going to default it to 1 sample and MSAA disabled. If you wanted to enable MSAA, you would need to set rasterizationSamples to more than 1, and enable sampleShading. Keep in mind that for MSAA to work, your renderpass also has to support it, which complicates things significantly.
VkPipelineMultisampleStateCreateInfo vkinit::multisampling_state_create_info()
	{
		VkPipelineMultisampleStateCreateInfo info = {};
		info.sType = VK_STRUCTURE_TYPE_PIPELINE_MULTISAMPLE_STATE_CREATE_INFO;
		info.pNext = nullptr;

		info.sampleShadingEnable = VK_FALSE;
		//multisampling defaulted to no multisampling (1 sample per pixel)
		info.rasterizationSamples = VK_SAMPLE_COUNT_1_BIT;
		info.minSampleShading = 1.0f;
		info.pSampleMask = nullptr;
		info.alphaToCoverageEnable = VK_FALSE;
		info.alphaToOneEnable = VK_FALSE;
		return info;
	}
Color Blend Attachment State
VkPipelineColorBlendAttachmentState Controls how this pipeline blends into a given attachment. We are rendering to only 1 attachment, so we will just need one of them, and defaulted to “not blend” and just override. In here it’s possible to make objects that will blend with the image. This one also doesn’t have sType + pNext
VkPipelineColorBlendAttachmentState vkinit::color_blend_attachment_state() {
		VkPipelineColorBlendAttachmentState colorBlendAttachment = {};
		colorBlendAttachment.colorWriteMask = VK_COLOR_COMPONENT_R_BIT | VK_COLOR_COMPONENT_G_BIT |
			VK_COLOR_COMPONENT_B_BIT | VK_COLOR_COMPONENT_A_BIT;
		colorBlendAttachment.blendEnable = VK_FALSE;
		return colorBlendAttachment;
	}
Finishing the PipelineBuilder
Now that have all of the structs, we need to fill the build_pipeline function of the PipelineBuilder, that assembles all of the above into the final Info struct to create the pipeline.
Let’s begin by connecting the viewport and scissor into ViewportState, and setting the ColorBlenderStateCreateInfo
VkPipeline PipelineBuilder::build_pipeline(VkDevice device, VkRenderPass pass) {
			//make viewport state from our stored viewport and scissor.
			//at the moment we won't support multiple viewports or scissors
			VkPipelineViewportStateCreateInfo viewportState = {};
			viewportState.sType = VK_STRUCTURE_TYPE_PIPELINE_VIEWPORT_STATE_CREATE_INFO;
			viewportState.pNext = nullptr;

			viewportState.viewportCount = 1;
			viewportState.pViewports = &_viewport;
			viewportState.scissorCount = 1;
			viewportState.pScissors = &_scissor;

			//setup dummy color blending. We aren't using transparent objects yet
			//the blending is just "no blend", but we do write to the color attachment
			VkPipelineColorBlendStateCreateInfo colorBlending = {};
			colorBlending.sType = VK_STRUCTURE_TYPE_PIPELINE_COLOR_BLEND_STATE_CREATE_INFO;
			colorBlending.pNext = nullptr;

			colorBlending.logicOpEnable = VK_FALSE;
			colorBlending.logicOp = VK_LOGIC_OP_COPY;
			colorBlending.attachmentCount = 1;
			colorBlending.pAttachments = &_colorBlendAttachment;
}
VkPipelineColorBlendStateCreateInfo contains the information about the attachments and how they are used. This one has to match the fragment shader outputs.
Time to connect everything to the main VkGraphicsPipelineCreateInfo and create it
VkPipeline PipelineBuilder::build_pipeline(VkDevice device, VkRenderPass pass) {

	// ... other code ...

	//build the actual pipeline
	//we now use all of the info structs we have been writing into into this one to create the pipeline
	VkGraphicsPipelineCreateInfo pipelineInfo = {};
	pipelineInfo.sType = VK_STRUCTURE_TYPE_GRAPHICS_PIPELINE_CREATE_INFO;
	pipelineInfo.pNext = nullptr;

	pipelineInfo.stageCount = _shaderStages.size();
	pipelineInfo.pStages = _shaderStages.data();
	pipelineInfo.pVertexInputState = &_vertexInputInfo;
	pipelineInfo.pInputAssemblyState = &_inputAssembly;
	pipelineInfo.pViewportState = &viewportState;
	pipelineInfo.pRasterizationState = &_rasterizer;
	pipelineInfo.pMultisampleState = &_multisampling;
	pipelineInfo.pColorBlendState = &colorBlending;
	pipelineInfo.layout = _pipelineLayout;
	pipelineInfo.renderPass = pass;
	pipelineInfo.subpass = 0;
	pipelineInfo.basePipelineHandle = VK_NULL_HANDLE;

	//it's easy to error out on create graphics pipeline, so we handle it a bit better than the common VK_CHECK case
	VkPipeline newPipeline;
	if (vkCreateGraphicsPipelines(
		device, VK_NULL_HANDLE, 1, &pipelineInfo, nullptr, &newPipeline) != VK_SUCCESS) {
		std::cout << "failed to create pipeline\n";
		return VK_NULL_HANDLE; // failed to create graphics pipeline
	}
	else
	{
		return newPipeline;
	}
Pipeline Layout
Alongside of all the State structs, we will need a VkPipelineLayout object for our pipeline. Unlike the other state structs, this one is an actual full Vulkan object, and needs to be created separately from the pipeline.
Pipeline layouts contain the information about shader inputs of a given pipeline. It’s here where you would configure your push-constants and descriptor sets, but at the time we won’t need it, so we are going to create an empty pipeline layout for our Pipeline
We need yet another info struct, so let’s add it.
VkPipelineLayoutCreateInfo vkinit::pipeline_layout_create_info() {
		VkPipelineLayoutCreateInfo info{};
		info.sType = VK_STRUCTURE_TYPE_PIPELINE_LAYOUT_CREATE_INFO;
		info.pNext = nullptr;

		//empty defaults
		info.flags = 0;
		info.setLayoutCount = 0;
		info.pSetLayouts = nullptr;
		info.pushConstantRangeCount = 0;
		info.pPushConstantRanges = nullptr;
		return info;
	}
We are setting pSetLayouts and pPushConstantRanges both to null because our shader has no inputs, but we will soon add something to here.
It is needed that we store the pipeline layout somewhere, as there are a lot of Vulkan commands that need it, so let’s add a member to our VulkanEngine class for it
class VulkanEngine{
public:

// ... other stuff ....

	VkPipelineLayout _trianglePipelineLayout;

private:
}
Now we have to create it from our init_pipelines() function.
void VulkanEngine::init_pipelines()
{
	//shader module loading


	//build the pipeline layout that controls the inputs/outputs of the shader
	//we are not using descriptor sets or other systems yet, so no need to use anything other than empty default
	VkPipelineLayoutCreateInfo pipeline_layout_info = vkinit::pipeline_layout_create_info();

	VK_CHECK(vkCreatePipelineLayout(_device, &pipeline_layout_info, nullptr, &_trianglePipelineLayout));
}
Creating the triangle pipeline
It’s now time to assemble everything together and build the pipeline for rendering the triangle.
Add _trianglePipeline as a new variable on the VulkanEngine class
class VulkanEngine {
public:
// ... other objects
	VkPipeline _trianglePipeline;
};
void VulkanEngine::init_pipelines()
{
	// layout and shader modules creation

	//build the stage-create-info for both vertex and fragment stages. This lets the pipeline know the shader modules per stage
	PipelineBuilder pipelineBuilder;

	pipelineBuilder._shaderStages.push_back(
		vkinit::pipeline_shader_stage_create_info(VK_SHADER_STAGE_VERTEX_BIT, triangleVertexShader));

	pipelineBuilder._shaderStages.push_back(
		vkinit::pipeline_shader_stage_create_info(VK_SHADER_STAGE_FRAGMENT_BIT, triangleFragShader));


	//vertex input controls how to read vertices from vertex buffers. We aren't using it yet
	pipelineBuilder._vertexInputInfo = vkinit::vertex_input_state_create_info();

	//input assembly is the configuration for drawing triangle lists, strips, or individual points.
	//we are just going to draw triangle list
	pipelineBuilder._inputAssembly = vkinit::input_assembly_create_info(VK_PRIMITIVE_TOPOLOGY_TRIANGLE_LIST);

	//build viewport and scissor from the swapchain extents
	pipelineBuilder._viewport.x = 0.0f;
	pipelineBuilder._viewport.y = 0.0f;
	pipelineBuilder._viewport.width = (float)_windowExtent.width;
	pipelineBuilder._viewport.height = (float)_windowExtent.height;
	pipelineBuilder._viewport.minDepth = 0.0f;
	pipelineBuilder._viewport.maxDepth = 1.0f;

	pipelineBuilder._scissor.offset = { 0, 0 };
	pipelineBuilder._scissor.extent = _windowExtent;

	//configure the rasterizer to draw filled triangles
	pipelineBuilder._rasterizer = vkinit::rasterization_state_create_info(VK_POLYGON_MODE_FILL);

	//we don't use multisampling, so just run the default one
	pipelineBuilder._multisampling = vkinit::multisampling_state_create_info();

	//a single blend attachment with no blending and writing to RGBA
	pipelineBuilder._colorBlendAttachment = vkinit::color_blend_attachment_state();

	//use the triangle layout we created
	pipelineBuilder._pipelineLayout = _trianglePipelineLayout;

	//finally build the pipeline
	_trianglePipeline = pipelineBuilder.build_pipeline(_device, _renderPass);
}
We have finally created the pipeline we needed to draw the triangle, so we can finally do it.
Let’s go to our main draw() function, and execute the draw.
We need to add the draw commands between VkCmdBeginRenderPass and vkCmdEndRenderPass
vkCmdBeginRenderPass(cmd, &rpInfo, VK_SUBPASS_CONTENTS_INLINE);

//once we start adding rendering commands, they will go here

vkCmdBindPipeline(cmd, VK_PIPELINE_BIND_POINT_GRAPHICS, _trianglePipeline);
vkCmdDraw(cmd, 3, 1, 0, 0);

//finalize the render pass
vkCmdEndRenderPass(cmd);
vkCmdBingPipeline sets the pipeline to be used on the further rendering commands, we bind the triangle pipeline here.
vkCmdDraw executes a draw, in this case we are drawing 1 object with 3 vertices.
Run it, and you should see a red triangle with a flashing blue background.
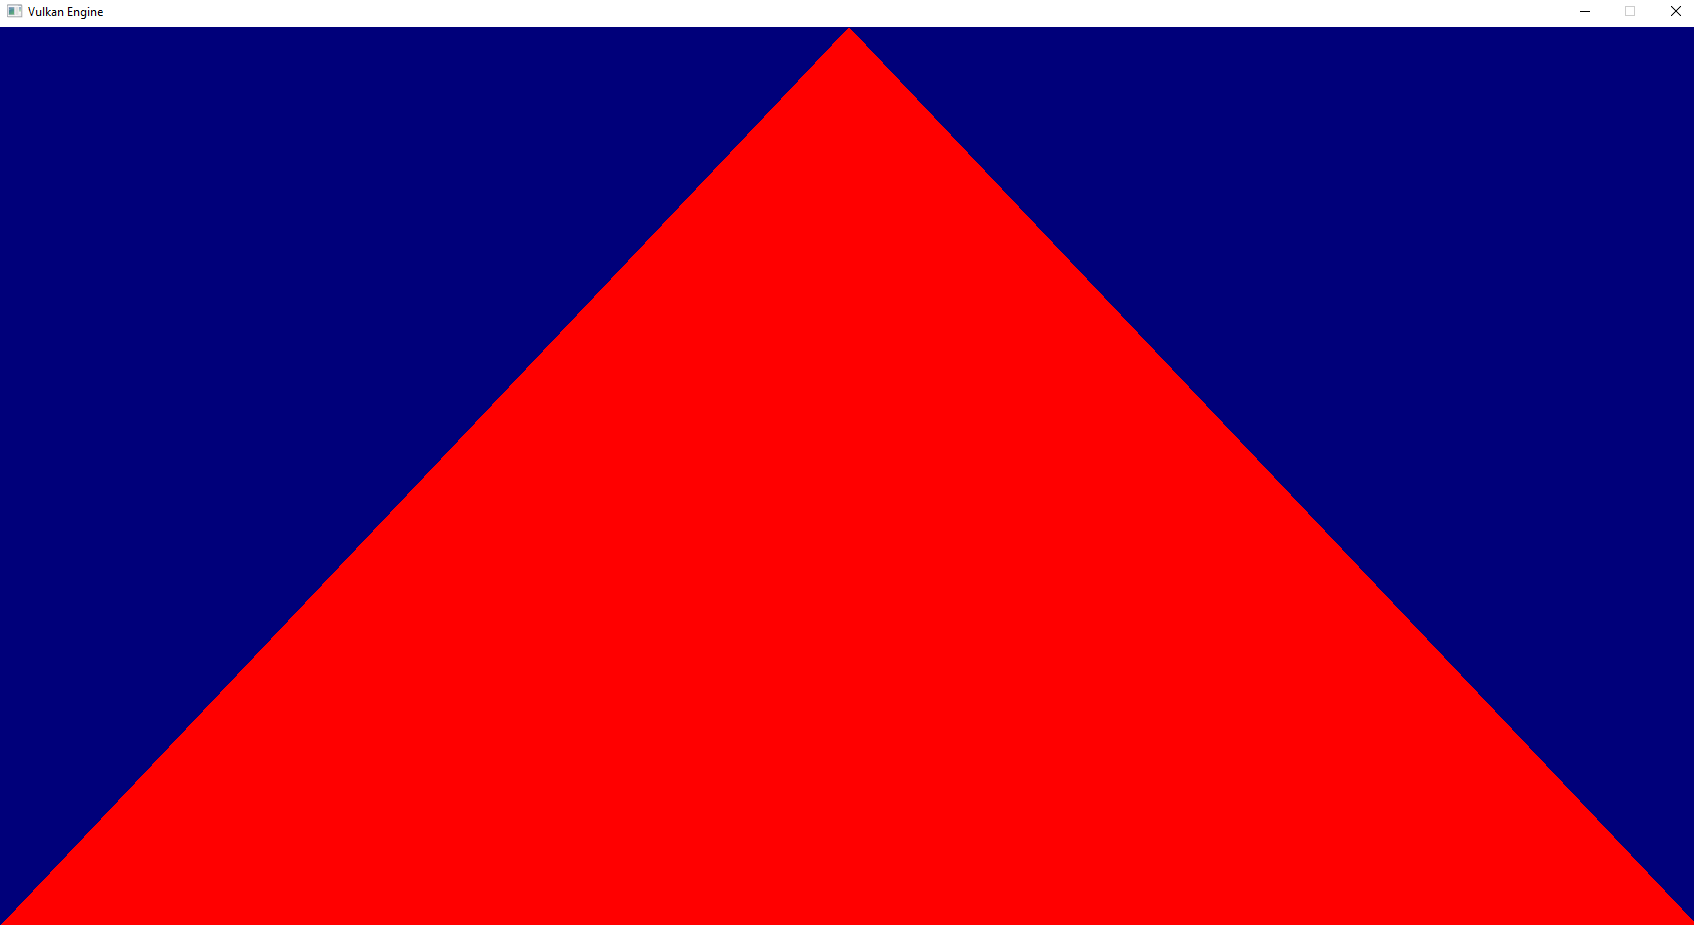
Congratulations on your first triangle! We can now proceed to do interesting things with the shaders to make it more interesting.
Next: Passing data through shader stages