When we created the renderpass in chapter 1, there is something we skipped to keep the code shorter, the depth buffer.
In 3d graphics, to make sure that you don’t render things that are behind other things on top, you use a depth buffer and use z-testing. By having a depth buffer bound to the renderpass, you can enable ztesting which will allow proper rendering of 3d objects.
We are going to refactor the code around the engine a little bit to enable this.
Depth image
When rendering, we are going to need a depth image to use. Before, we were using the swapchain images as render target, but the swapchains don’t contain a depth image, the depth image has to be created separately. We are going to create one depth image to match with our swapchain image.
First of all, we are going to create the AllocatedImage struct, which is the same as AllocatedBuffer we are using, but for images instead of buffers, as we will be using VMA to allocate the depth image.
on vulkan_types.h, we add the struct
struct AllocatedImage {
    VkImage _image;
    VmaAllocation _allocation;
};
It’s exactly the same as AllocatedBuffer but with VkImage instead of VkBuffer.
We can now add it to VulkanEngine class to store it
class VulkanEngine {
public:
	//other code ....
	VkImageView _depthImageView;
	AllocatedImage _depthImage;

	//the format for the depth image
	VkFormat _depthFormat;
    //other code ....
}
In vulkan you can’t use VkImages directly, the VkImages have to go through a VkImageView, which contains some information about how to treat the image. We are doing it in a similar way as the swapchain images, but instead of letting the Vkbootstrap library initialize them, we will do it ourselves.
We are going to need a new initializer for our vk_initializers file for the image create info and image view create info, so let’s add it.
vk_initializers.h
namespace vkinit {
	//other .....
VkImageCreateInfo image_create_info(VkFormat format, VkImageUsageFlags usageFlags, VkExtent3D extent);

VkImageViewCreateInfo imageview_create_info(VkFormat format, VkImage image, VkImageAspectFlags aspectFlags);
}
VkImageCreateInfo vkinit::image_create_info(VkFormat format, VkImageUsageFlags usageFlags, VkExtent3D extent)
{
    VkImageCreateInfo info = { };
    info.sType = VK_STRUCTURE_TYPE_IMAGE_CREATE_INFO;
    info.pNext = nullptr;

    info.imageType = VK_IMAGE_TYPE_2D;

    info.format = format;
    info.extent = extent;

    info.mipLevels = 1;
    info.arrayLayers = 1;
    info.samples = VK_SAMPLE_COUNT_1_BIT;
    info.tiling = VK_IMAGE_TILING_OPTIMAL;
    info.usage = usageFlags;

    return info;
}
As usual, sType and pNext set properly. imageType holds how many dimensions the image has. 1, 2, or 3. Because 3d and 1d textures can be niche, we are just defaulting it to 2d images on the initializer.
Format holds what the data of the texture is, like holding a single float (for depth), or holding color. Extent is the size of the image, in pixels.
MipLevels holds the amount of mipmap levels the image has. Because we aren’t using them here, we leave the levels to 1. Array layers is for layered textures. You can create textures that are many-in-one, using layers. An example of layered textures is cubemaps, where you have 6 layers, one layer for each face of the cubemap. We default it to 1 layer because we aren’t doing cubemaps.
Samples controls the MSAA behavior of the texture. This only makes sense for render targets, such as depth images and images you are rendering to. We won’t be doing MSAA in this tutorial, so samples will be kept at 1 sample for the entire guide.
Tiling is very important. Tiling describes how the data for the texture is arranged in the GPU. For improved performance, GPUs do not store images as 2d arrays of pixels, but instead use complex custom formats, unique to the GPU brand and even models. VK_IMAGE_TILING_OPTIMAL tells vulkan to let the driver decide how the GPU arranges the memory of the image. If you use VK_IMAGE_TILING_OPTIMAL, it won’t be possible to read the data from CPU or to write it without changing its tiling first (it’s possible to change the tiling of a texture at any point, but this can be a costly operation). The other tiling we can care about is VK_IMAGE_TILING_LINEAR, which will store the image as a 2d array of pixels. While LINEAR tiling will be a lot slower, it will allow the cpu to safely write and read from that memory.
Last thing is usage flags. In a similar way to the buffers, images need the usage flags to be set properly. It is very important that the usage flags are set correctly, and you only set the flags you are going to need, because this will control how the GPU handles the image memory.
Next is the image-view
VkImageViewCreateInfo vkinit::imageview_create_info(VkFormat format, VkImage image, VkImageAspectFlags aspectFlags)
{
	//build a image-view for the depth image to use for rendering
	VkImageViewCreateInfo info = {};
	info.sType = VK_STRUCTURE_TYPE_IMAGE_VIEW_CREATE_INFO;
	info.pNext = nullptr;

	info.viewType = VK_IMAGE_VIEW_TYPE_2D;
	info.image = image;
	info.format = format;
	info.subresourceRange.baseMipLevel = 0;
	info.subresourceRange.levelCount = 1;
	info.subresourceRange.baseArrayLayer = 0;
	info.subresourceRange.layerCount = 1;
	info.subresourceRange.aspectMask = aspectFlags;

	return info;
}
sType and pNext as usual. View Type is very similar to the imageType on the image, except it has more options. While imageType held the dimensionality of the texture, viewType has a lot more options, like VK_IMAGE_VIEW_TYPE_CUBE for cubemaps. In here, we will have it matched to image_create_info, and hardcode it to 2D images as it’s the most common case.
image has to point to the image this imageview is being created from. As imageViews “wrap” an image, you need to point to the original one. format has to match the format in the image this view was created from. It’s possible for the formats to not match, and that will let you “reinterpret” the formats, but that can be tricky to use, and very niche, so for now make sure that the formats will match.
subresourceRange holds the information about where the image points to. This is used for layered images, where you might have multiple layers in one image, and want to create an imageview that points to a specific layer. It’s also possible to control the mipmap levels with it. For our current usage, we are going to default it to no mipmaps (mipmap base 0, and mipmaps level 1), and only 1 texture layer.
aspectMask is similar to the usageFlags from the image. It’s about what this image is used for.
Now that we have those initializers, we can create the depth image.
To allocate the depth image and create its imageview, we are going to add this code into the init_swapchain function.
void VulkanEngine::init_swapchain()
{
	// other code ....

	//depth image size will match the window
	VkExtent3D depthImageExtent = {
        _windowExtent.width,
        _windowExtent.height,
        1
    };

	//hardcoding the depth format to 32 bit float
	_depthFormat = VK_FORMAT_D32_SFLOAT;

	//the depth image will be an image with the format we selected and Depth Attachment usage flag
	VkImageCreateInfo dimg_info = vkinit::image_create_info(_depthFormat, VK_IMAGE_USAGE_DEPTH_STENCIL_ATTACHMENT_BIT, depthImageExtent);

	//for the depth image, we want to allocate it from GPU local memory
	VmaAllocationCreateInfo dimg_allocinfo = {};
	dimg_allocinfo.usage = VMA_MEMORY_USAGE_GPU_ONLY;
	dimg_allocinfo.requiredFlags = VkMemoryPropertyFlags(VK_MEMORY_PROPERTY_DEVICE_LOCAL_BIT);

	//allocate and create the image
	vmaCreateImage(_allocator, &dimg_info, &dimg_allocinfo, &_depthImage._image, &_depthImage._allocation, nullptr);

	//build an image-view for the depth image to use for rendering
	VkImageViewCreateInfo dview_info = vkinit::imageview_create_info(_depthFormat, _depthImage._image, VK_IMAGE_ASPECT_DEPTH_BIT);

	VK_CHECK(vkCreateImageView(_device, &dview_info, nullptr, &_depthImageView));

	//add to deletion queues
	_mainDeletionQueue.push_function([=]() {
		vkDestroyImageView(_device, _depthImageView, nullptr);
		vmaDestroyImage(_allocator, _depthImage._image, _depthImage._allocation);
	});
}
First we are hardcoding the depth format to 32 bit float. Most GPUs support this depth format, so it’s fine to use it. You might want to choose other formats for other uses, or if you use Stencil buffer.
For the image itself, we are going to create it using the depth format, with VK_IMAGE_USAGE_DEPTH_STENCIL_ATTACHMENT_BIT for usage, and the same size as the window. VK_IMAGE_USAGE_DEPTH_STENCIL_ATTACHMENT_BIT lets the vulkan driver know that this will be a depth image used for z-testing.
To allocate the image, we are using VMA in almost the same way as the vertex buffers before. But this time we use VMA_MEMORY_USAGE_GPU_ONLY to make sure that the image is allocated on fast VRAM. This is critical for something like an image we are rendering to. Rendering into an image stored in cpu ram might not even be doable. To make absolutely sure that VMA really allocates the image into VRAM, we give it VK_MEMORY_PROPERTY_DEVICE_LOCAL_BIT on required flags. This forces VMA library to allocate the image on VRAM no matter what. (The Memory Usage part is more like a hint)
We create the image using vmaCreateImage, same as vmaCreatebuffer we did before.
Now that the image is allocated and created, we need to create the imageview from it. For the image-aspect of the imageview, we are using VK_IMAGE_ASPECT_DEPTH_BIT, to again let the driver know that this will be used for depthtesting.
The image is now created, so now we have to hook it into the renderpass.
Depth target on renderpass
On the init_default_renderpass() function, we are going to add the depth target to it.
void VulkanEngine::init_default_renderpass()
{
	//VkAttachmentDescription color_attachment code

    VkAttachmentDescription depth_attachment = {};
    // Depth attachment
    depth_attachment.flags = 0;
    depth_attachment.format = _depthFormat;
    depth_attachment.samples = VK_SAMPLE_COUNT_1_BIT;
    depth_attachment.loadOp = VK_ATTACHMENT_LOAD_OP_CLEAR;
    depth_attachment.storeOp = VK_ATTACHMENT_STORE_OP_STORE;
    depth_attachment.stencilLoadOp = VK_ATTACHMENT_LOAD_OP_CLEAR;
    depth_attachment.stencilStoreOp = VK_ATTACHMENT_STORE_OP_DONT_CARE;
    depth_attachment.initialLayout = VK_IMAGE_LAYOUT_UNDEFINED;
    depth_attachment.finalLayout = VK_IMAGE_LAYOUT_DEPTH_STENCIL_ATTACHMENT_OPTIMAL;

    VkAttachmentReference depth_attachment_ref = {};
    depth_attachment_ref.attachment = 1;
    depth_attachment_ref.layout = VK_IMAGE_LAYOUT_DEPTH_STENCIL_ATTACHMENT_OPTIMAL;
}
The first thing we are going to need is the attachment description and attachment reference for depth.
The code goes right below initializing the attachments for color. Both the depth attachment and its reference are copypaste of the color one, as it works the same, but with a small change.
depth_attachment.format = _depthFormat; is set to the depth format that we created the depth image at.
depth_attachment.finalLayout = VK_IMAGE_LAYOUT_DEPTH_STENCIL_ATTACHMENT_OPTIMAL; In the same way that color attachment layout was at COLOR_ATTACHMENT_OPTIMAL, we set the set the final layout to DEPTH_STENCIL_ATTACHMENT_OPTIONAL because this is a depth stencil attachment, not a color one. Same thing with the layout on the depth attachment reference
We need to hook this attachment to the subpass, so change it to this
//we are going to create 1 subpass, which is the minimum you can do
	VkSubpassDescription subpass = {};
	subpass.pipelineBindPoint = VK_PIPELINE_BIND_POINT_GRAPHICS;
	subpass.colorAttachmentCount = 1;
	subpass.pColorAttachments = &color_attachment_ref;
	//hook the depth attachment into the subpass
	subpass.pDepthStencilAttachment = &depth_attachment_ref;
This will connect the depth attachment to our main subpass of rendering. We also need to add the depth attachment to the attachment list in the renderpass itself, which is done like this
	//array of 2 attachments, one for the color, and other for depth
	VkAttachmentDescription attachments[2] = { color_attachment,depth_attachment };

	VkRenderPassCreateInfo render_pass_info = {};
	render_pass_info.sType = VK_STRUCTURE_TYPE_RENDER_PASS_CREATE_INFO;
	//2 attachments from said array
	render_pass_info.attachmentCount = 2;
	render_pass_info.pAttachments = &attachments[0];
	render_pass_info.subpassCount = 1;
	render_pass_info.pSubpasses = &subpass;
Instead of storing only the color attachment in pAttachments, we add the depth attachment there too.
Now we have to adjust the renderpass synchronization. Previously, it was possible that multiple frames were rendered simultaneously by the GPU. This is a problem when using depth buffers, because one frame could overwrite the depth buffer while a previous frame is still rendering to it.
We keep the subpass dependency for the color attachment we were already using:
VkSubpassDependency dependency = {};
dependency.srcSubpass = VK_SUBPASS_EXTERNAL;
dependency.dstSubpass = 0;
dependency.srcStageMask = VK_PIPELINE_STAGE_COLOR_ATTACHMENT_OUTPUT_BIT;
dependency.srcAccessMask = 0;
dependency.dstStageMask = VK_PIPELINE_STAGE_COLOR_ATTACHMENT_OUTPUT_BIT;
dependency.dstAccessMask = VK_ACCESS_COLOR_ATTACHMENT_WRITE_BIT;
We also add a new subpass dependency that synchronizes accesses to depth attachments.
VkSubpassDependency depth_dependency = {};
depth_dependency.srcSubpass = VK_SUBPASS_EXTERNAL;
depth_dependency.dstSubpass = 0;
depth_dependency.srcStageMask = VK_PIPELINE_STAGE_EARLY_FRAGMENT_TESTS_BIT | VK_PIPELINE_STAGE_LATE_FRAGMENT_TESTS_BIT;
depth_dependency.srcAccessMask = 0;
depth_dependency.dstStageMask = VK_PIPELINE_STAGE_EARLY_FRAGMENT_TESTS_BIT | VK_PIPELINE_STAGE_LATE_FRAGMENT_TESTS_BIT;
depth_dependency.dstAccessMask = VK_ACCESS_DEPTH_STENCIL_ATTACHMENT_WRITE_BIT;
This dependency tells Vulkan that the depth attachment in a renderpass cannot be used before previous renderpasses have finished using it.
Finally, we need to include both dependencies in the VkRenderPassCreateInfo:
VkSubpassDependency dependencies[2] = { dependency, depth_dependency };

//other code...
render_pass_info.dependencyCount = 2;
render_pass_info.pDependencies = &dependencies[0];
With that, the renderpass now supports depth attachments. Now we need to modify our framebuffers so that they point to the depth image.
On the init_framebuffers() function, we connect the depth image view when creating each of the framebuffers.
for (int i = 0; i < swapchain_imagecount; i++) {

    VkImageView attachments[2];
	attachments[0] = _swapchainImageViews[i];
	attachments[1] = _depthImageView;

	fb_info.pAttachments = attachments;
	fb_info.attachmentCount = 2;

	VK_CHECK(vkCreateFramebuffer(_device, &fb_info, nullptr, &_framebuffers[i]));
}
Note how we are using the same depth image on each of the swapchain framebuffers. This is because we do not need to change the depth image between frames, we can just keep clearing and reusing the same depth image for every frame.
The renderpass initialization for depth buffer is now done, so the last thing needed is to add depth-testing to our pipeline for the mesh.
We are going to add yet another initializer to the list, this time for VkPipelineDepthStencilStateCreateInfo, which holds the information about how to use depth-testing on a render pipeline.
VkPipelineDepthStencilStateCreateInfo vkinit::depth_stencil_create_info(bool bDepthTest, bool bDepthWrite, VkCompareOp compareOp)
{
    VkPipelineDepthStencilStateCreateInfo info = {};
    info.sType = VK_STRUCTURE_TYPE_PIPELINE_DEPTH_STENCIL_STATE_CREATE_INFO;
    info.pNext = nullptr;

    info.depthTestEnable = bDepthTest ? VK_TRUE : VK_FALSE;
    info.depthWriteEnable = bDepthWrite ? VK_TRUE : VK_FALSE;
    info.depthCompareOp = bDepthTest ? compareOp : VK_COMPARE_OP_ALWAYS;
    info.depthBoundsTestEnable = VK_FALSE;
    info.minDepthBounds = 0.0f; // Optional
    info.maxDepthBounds = 1.0f; // Optional
    info.stencilTestEnable = VK_FALSE;

    return info;
}
Depth stencil create info is a bit more complicated than other initializers, so we are abstracting things a little bit.
depthTestEnable holds if we should do any z-culling at all. Set to VK_FALSE to draw on top of everything, and VK_TRUE to not draw on top of other objects. depthWriteEnable allows the depth to be written. While DepthTest and DepthWrite will both be true most of the time, there are cases where you might want to do depth write, but without doing depthtesting; it’s sometimes used for some special effects.
The depthCompareOp holds the depth-testing function. Set to VK_COMPARE_OP_ALWAYS to not do any depthtest at all. Other common depth compare OPs are VK_COMPARE_OP_LESS (Only draw if Z < whatever is on the depth buffer), or VK_COMPARE_OP_EQUAL (only draw if the depth z matches)
min and max depth bounds lets us cap the depth test. If the depth is outside of bounds, the pixel will be skipped. And last, we won’t be using stencil test, so that’s set to VK_FALSE by default.
Now we go back to the PipelineBuilder, and we add the depth state to it.
vk_engine.h
class PipelineBuilder {
	public:
	//others
	VkPipelineDepthStencilStateCreateInfo _depthStencil;
}
And of course, make sure that it’s used when building the pipeline. On build_pipeline, we hook the depth stencil state into the VkGraphicsPipelineCreateInfo
VkPipeline PipelineBuilder::build_pipeline(VkDevice device, VkRenderPass pass)
{
	// other code ....
	VkGraphicsPipelineCreateInfo pipelineInfo = {};

	//other states
	pipelineInfo.pDepthStencilState = &_depthStencil;
}
Now that we added depthtest functionality to the pipeline builder, we can finally enable depthtest for our main mesh pipeline.
on our init_pipelines(), we add default depthtest state to the builder, and this will add depthtesting to all of the shaders.
//default depthtesting
pipelineBuilder._depthStencil = vkinit::depth_stencil_create_info(true, true, VK_COMPARE_OP_LESS_OR_EQUAL);
//finally build the pipeline
_trianglePipeline = pipelineBuilder.build_pipeline(_device, _renderPass);
The pipelines now do depthtest, so only thing left is to make sure that the depth image is cleared every frame.
In the same way we clear color when beginning the main rendering renderpass, we clear depth.
VulkanEngine::draw(){
	// other code ....

	//make a clear-color from frame number. This will flash with a 120 frame period.
	VkClearValue clearValue;
	float flash = abs(sin(_frameNumber / 120.f));
	clearValue.color = { { 0.0f, 0.0f, flash, 1.0f } };

	//clear depth at 1
	VkClearValue depthClear;
	depthClear.depthStencil.depth = 1.f;

	//start the main renderpass.
	//We will use the clear color from above, and the framebuffer of the index the swapchain gave us
	VkRenderPassBeginInfo rpInfo = vkinit::renderpass_begin_info(_renderPass, _windowExtent, _framebuffers[swapchainImageIndex]);

	//connect clear values
	rpInfo.clearValueCount = 2;

	VkClearValue clearValues[] = { clearValue, depthClear };

	rpInfo.pClearValues = &clearValues[0];

	vkCmdBeginRenderPass(cmd, &rpInfo, VK_SUBPASS_CONTENTS_INLINE);

	//other code ...
We will clear the depth buffer at 1.0 (max depth), and add it to the clear values of the renderpass init info.
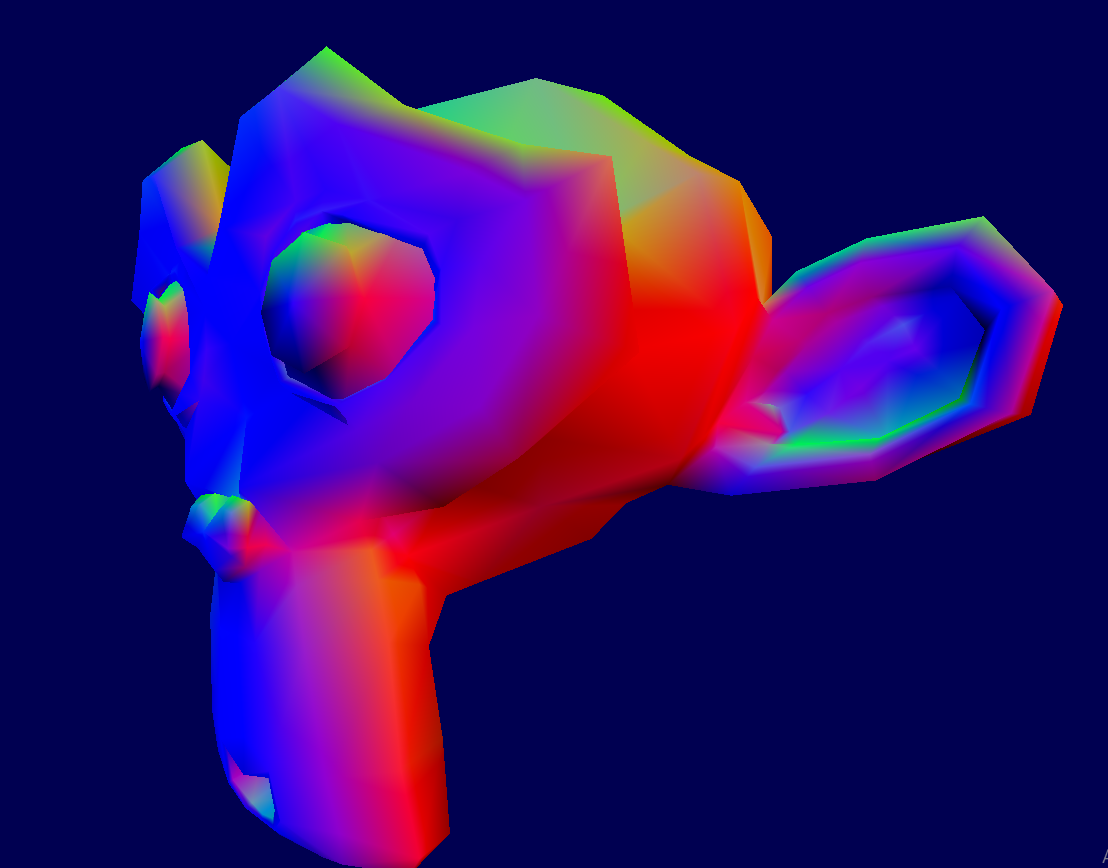
If you now execute the application, and everything went well, you should be seeing a very beautiful spinning monkey head.
Next: Scene management